如何添加公交路线
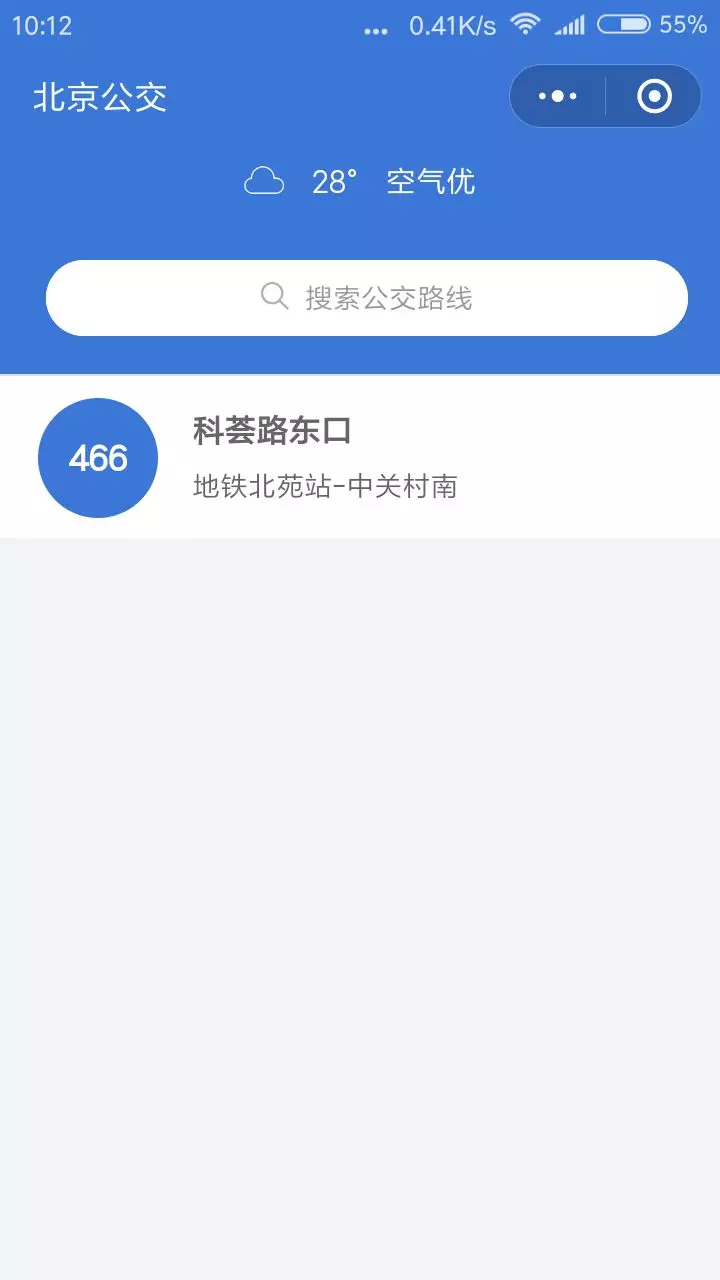
小程序首页头部展示的是当前位置的天气情况,包括实时温度和空气质量。天气下面的搜索框就是添加公交路线的入口。点击搜索框跳转到【添加公交路线】页面。
输入你要添加的公交路线,如101,或者专101等…系统会匹配出相关公交路线。
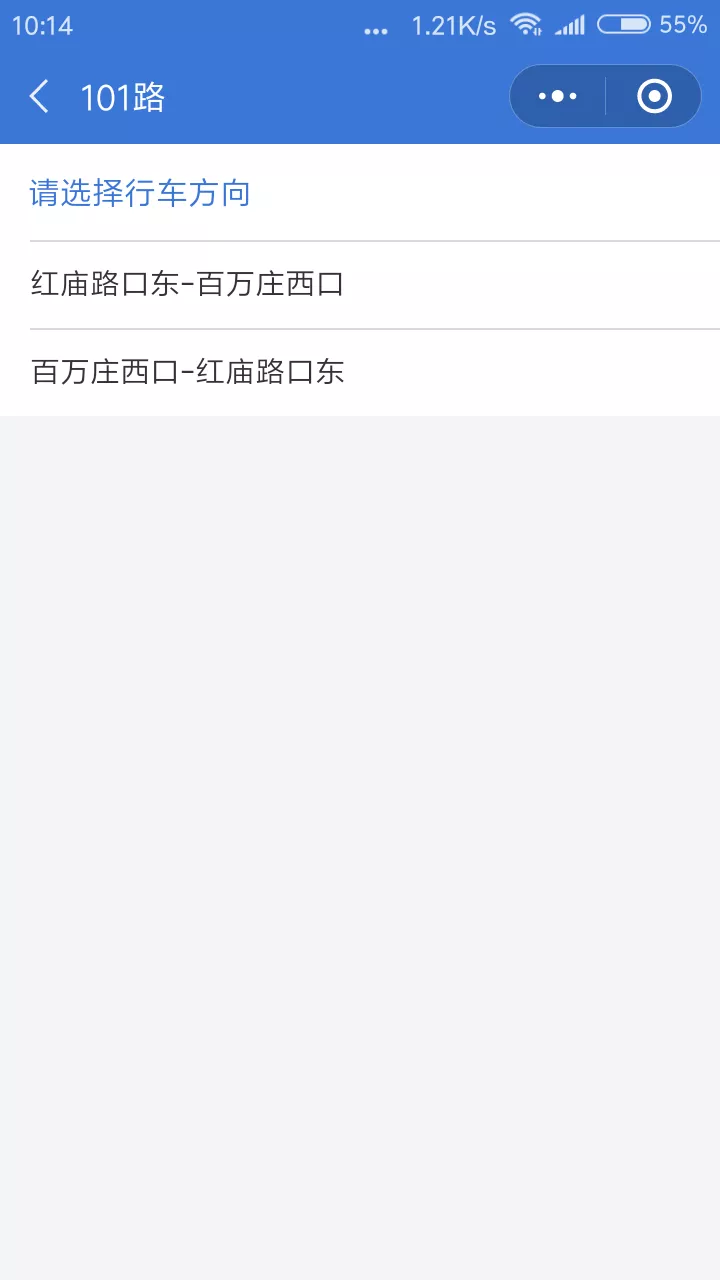
点击公交路线,跳转到【选择行车方向】页面。点击你要查询公交的方向
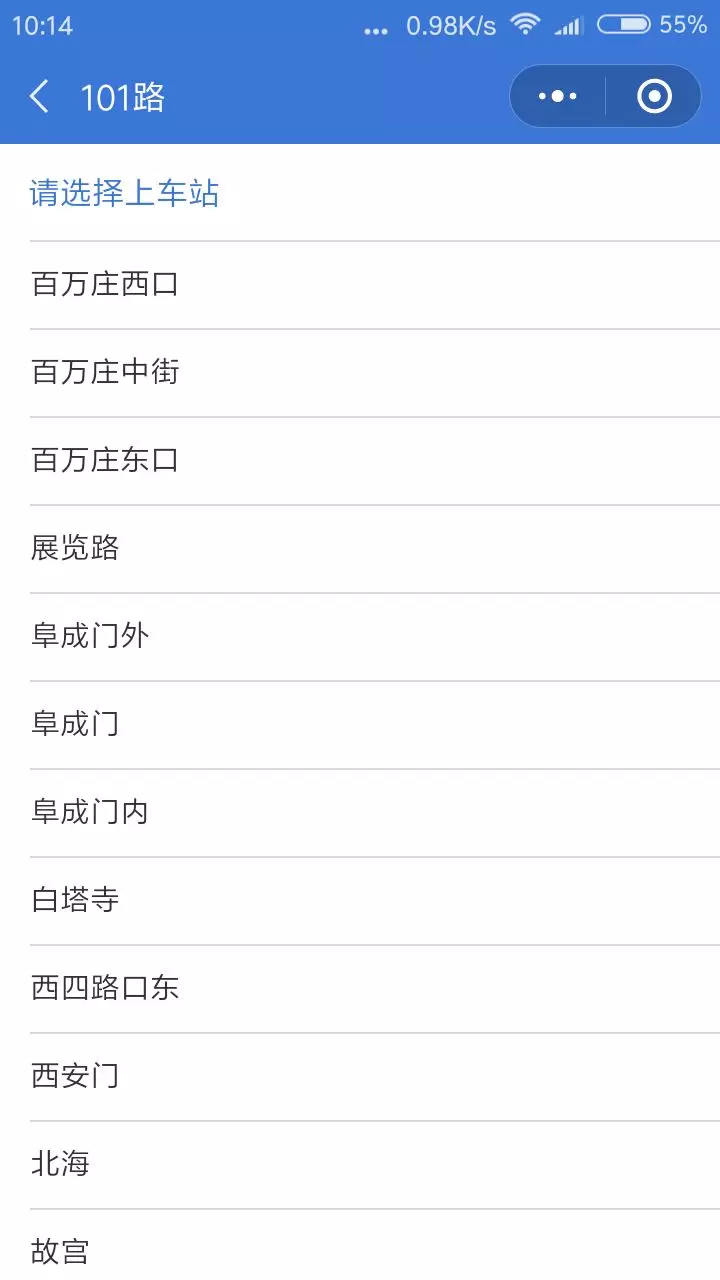
同理点击公交行车方向后,跳转到【选择上车站】页面。这里点击你要乘坐公交的上车站即可。


计算视图(View)的位置
即计算View的四个顶点位置:Left、Top、Right 和 Bottom
类似measure过程,layout过程根据View的类型分为2种情况:
layout过程的入口 = layout(),具体如下:1
2
3
4
5
6
7
8
9
10
11
12
13
14
15
16
17
18
19
20
21
22
23
24
25
26
27
28
29
30
31
32
33
34
35
36
37
38
39
40
41
42
43
44
45
46
47
48
49
50
51
52
53
54
55
56
57
58
59
60
61
62
63
64
65
66
67
68
69
70
71
72
73
74
75
76
77
78
79
80
81
82
83
84/**
* 源码分析:layout()
* 作用:确定View本身的位置,即设置View本身的四个顶点位置
*/
public void layout(int l, int t, int r, int b) {
// 当前视图的四个顶点
int oldL = mLeft;
int oldT = mTop;
int oldB = mBottom;
int oldR = mRight;
// 1. 确定View的位置:setFrame() / setOpticalFrame()
// 即初始化四个顶点的值、判断当前View大小和位置是否发生了变化 & 返回
// ->>分析1、分析2
boolean changed = isLayoutModeOptical(mParent) ?
setOpticalFrame(l, t, r, b) : setFrame(l, t, r, b);
// 2. 若视图的大小 & 位置发生变化
// 会重新确定该View所有的子View在父容器的位置:onLayout()
if (changed || (mPrivateFlags & PFLAG_LAYOUT_REQUIRED) == PFLAG_LAYOUT_REQUIRED) {
onLayout(changed, l, t, r, b);
// 对于单一View的laytou过程:由于单一View是没有子View的,故onLayout()是一个空实现->>分析3
// 对于ViewGroup的laytou过程:由于确定位置与具体布局有关,所以onLayout()在ViewGroup为1个抽象方法,需重写实现(后面会详细说)
...
}
/**
* 分析1:setFrame()
* 作用:根据传入的4个位置值,设置View本身的四个顶点位置
* 即:最终确定View本身的位置
*/
protected boolean setFrame(int left, int top, int right, int bottom) {
...
// 通过以下赋值语句记录下了视图的位置信息,即确定View的四个顶点
// 从而确定了视图的位置
mLeft = left;
mTop = top;
mRight = right;
mBottom = bottom;
mRenderNode.setLeftTopRightBottom(mLeft, mTop, mRight, mBottom);
}
/**
* 分析2:setOpticalFrame()
* 作用:根据传入的4个位置值,设置View本身的四个顶点位置
* 即:最终确定View本身的位置
*/
private boolean setOpticalFrame(int left, int top, int right, int bottom) {
Insets parentInsets = mParent instanceof View ?
((View) mParent).getOpticalInsets() : Insets.NONE;
Insets childInsets = getOpticalInsets();
// 内部实际上是调用setFrame()
return setFrame(
left + parentInsets.left - childInsets.left,
top + parentInsets.top - childInsets.top,
right + parentInsets.left + childInsets.right,
bottom + parentInsets.top + childInsets.bottom);
}
// 回到调用原处
/**
* 分析3:onLayout()
* 注:对于单一View的laytou过程
* a. 由于单一View是没有子View的,故onLayout()是一个空实现
* b. 由于在layout()中已经对自身View进行了位置计算,所以单一View的layout过程在layout()
* 后就已完成了
*/
protected void onLayout(boolean changed, int left, int top, int right, int bottom) {
// 参数说明
// changed 当前View的大小和位置改变了
// left 左部位置
// top 顶部位置
// right 右部位置
// bottom 底部位置
}
在Activity中,所有的View都是DecorView的子View,然后DecorView又是被ViewRootImpl所控制,当Activity显示的时候,ViewRootImpl的performTranversals方法开始运行,这个方法很长,不过核心的三个流程就是依次调用performMeasure、performLayout、performDraw三个方法,从而完成DecorView的绘制。
其中,ViewRootImpl#performMeasure方法如下:1
2
3
4
5
6
7
8private void performMeasure(int childWidthMeasureSpec, int childHeightMeasureSpec) {
Trace.traceBegin(Trace.TRACE_TAG_VIEW, "measure");
try {
mView.measure(childWidthMeasureSpec, childHeightMeasureSpec);
} finally {
Trace.traceEnd(Trace.TRACE_TAG_VIEW);
}
}
这里直接调用了mView的measure方法,参数是两个经过设置的MeasureSpec,接下来我们分析一下MeasureSpec是如何设置的。
测量规格(MeasureSpec) = 测量模式(mode) + 测量大小(size)
这个MeasureSpec不是实际测绘值,而是父View传递给子View的布局要求,MeasureSpec涵盖了对子View大小和模式的要求。其中,三种模式要求分别是:
UNSPECIFIED:对子View无任何要求,想要测绘多少由子View决定。
EXACTLY:父View已确定了自己确切的大小。子View将在这个边界内测绘自己的宽高。
AT_MOST:父View对子View没有要求,子View可以达到它想要的大小。
1 | private static final int MODE_SHIFT = 30; |
Gunicorn ‘Green Unicorn’ 是一个给 UNIX 用的 WSGI HTTP 服务器。这是一个从 Ruby 的 Unicorn 项目移植的 pre-fork worker 模式。它既支持 eventlet ,也支持 greenlet 。
1 | pip install gunicorn |
在这个服务器上运行 Flask 应用是相当简单的:1
gunicorn myproject:app
Gunicorn 提供了许多命令行选项 —— 见 gunicorn -h 。 例如,用四个 worker 进程( gunicorn -h )来运行一个 Flask 应用,绑定到 localhost 的4000 端口( -b127.0.0.1:4000 ):1
gunicorn -w 4 -b 127.0.0.1:4000 myproject:app
配置文件方式启动1
gunicorn -c gunicorn.conf.py app:app
配置内容为:1
2
3
4
5
6
7
8
9
10# coding=utf-8
import multiprocessing
bind = "127.0.0.1:8000" #绑定的ip与端口
workers = 4 #核心数
errorlog = '/home/yu/project/log/bus/gunicorn.error.log' #发生错误时log的路径
accesslog = '/home/yu/project/log/bus/gunicorn.access.log' #正常时的log路径
#loglevel = 'debug' #日志等级
proc_name = 'project_bus' #进程名
当一个对象已经不需要再使用了,本该被回收时,而有另外一个正在使用的对象持有它的引用从而导致它不能被回收,这导致本该被回收的对象不能被回收而停留在堆内存中,这就产生了内存泄漏。
Android中常见的内存泄漏汇总
单例模式非常受开发者的喜爱,不过使用的不恰当的话也会造成内存泄漏,由于单例的静态特性使得单例的生命周期和应用的生命周期一样长,这就说明了如果一个对象已经不需要使用了,而单例对象还持有该对象的引用,那么这个对象将不能被正常回收,这就导致了内存泄漏。
如下这个典例:1
2
3
4
5
6
7
8
9
10
11
12
13public class AppManager {
private static AppManager instance;
private Context context;
private AppManager(Context context) {
this.context = context;
}
public static AppManager getInstance(Context context) {
if (instance != null) {
instance = new AppManager(context);
}
return instance;
}
}
这是一个普通的单例模式,当创建这个单例的时候,由于需要传入一个Context,所以这个Context的生命周期的长短至关重要:
1 | public class AppManager { |
1 | public class MainActivity extends AppCompatActivity { |
1 | public class MainActivity extends AppCompatActivity { |
1 | public class MainActivity extends AppCompatActivity { |
1 | public class MainActivity extends AppCompatActivity { |
1 | static class MyAsyncTask extends AsyncTask<Void, Void, Void> { |
每个人都知道一个 App 的成功,与这个 App 的性能体验有着很密切的关系。但是如何让你的 App 拥有极致性能体验呢?在 DroidCon NYC 2015 的这个分享里,Boris Farber 带来了他关于 Android Api 以及如何避免一些常见坑的经验。带你了解如何缩短启动时间,优化滑动效果,创建更加顺滑的用户体验。
Save the date for Droidcon SF in March — a conference with best-in-class presentations from leaders in all parts of the Android ecosystem.
大家好,我是 Boris,现在是 Google 的一枚员工,目前专注于需要高性能的 App。这个分享是我长期以来从错误中,以及在给合作伙伴做咨询的时候攒下的最佳实践。如果你有一个小型的 App,读过之后,会在你的 App 成长阶段起到帮助。
我常常会见到那些启动时间很长,滑动不流畅,甚至出现没有反应的 App。我们通常要花很多时间去改善这些问题,毕竟我们都希望自己的 App 能够成功。
函数是一个特殊的对象,和对象的区别:函数通过对象的拷贝来完成赋值,对象是通过引用指向来完成。
虽然在一个独立的函数调用中,根据是否是strict模式,this指向undefined或window,不过,我们还是可以控制this的指向的!
要指定函数的this指向哪个对象,可以用函数本身的apply方法,它接收两个参数,第一个参数就是需要绑定的this变量,第二个参数是Array,表示函数本身的参数。
用apply修复getAge()调用:1
2
3
4
5
6
7
8
9
10
11
12
13function getAge() {
var y = new Date().getFullYear();
return y - this.birth;
}
var xiaoming = {
name: '小明',
birth: 1990,
age: getAge
};
xiaoming.age(); // 25
getAge.apply(xiaoming, []); // 25, this指向xiaoming, 参数为空
另一个与apply()类似的方法是call(),唯一区别是:
apply()把参数打包成Array再传入;
虽然最新搬瓦工控制面板里去掉了一键安装选项,但是可以通过以下链接一键安装:
shadowsocks
shadowsocksr
ssh -p 21 root@104.224.132.44